
| 일 | 월 | 화 | 수 | 목 | 금 | 토 |
|---|---|---|---|---|---|---|
| 1 | 2 | 3 | 4 | 5 | 6 | |
| 7 | 8 | 9 | 10 | 11 | 12 | 13 |
| 14 | 15 | 16 | 17 | 18 | 19 | 20 |
| 21 | 22 | 23 | 24 | 25 | 26 | 27 |
| 28 | 29 | 30 |
- lambda
- Thread
- 일프로
- 람다
- 알고리즘
- 도커
- 컨테이너
- 시작하세요 도커 & 쿠버네티스
- 스레드
- 자료구조
- SQL
- 김영한
- Kubernetes
- 자바 입출력 스트림
- container
- 동시성
- java
- 데이터베이스
- 쿠버네티스
- mysql
- 쓰레드
- RDB
- 함수형 인터페이스
- 도커 엔진
- 인프런
- Docker
- db
- 실전 자바 고급 1편
- 자바
- replicaset
- Today
- Total
쌩로그
Practical Testing 실용적인 테스트 가이드 - Section 08. Appendix 본문
목록
- 포스팅 개요
- 본론
2-1. 학습 테스트
2-2. Spring REST Docs - 요약
1. 포스팅 개요
인프런에서 박우빈님의 Practical Testing: 실용적인 테스트 가이드 강의 섹션 8 Appendix를 학습하며 정리한 포스팅이다.
말 그대로 부록이다.
부록이지만 중요하다.
| 참고 이전 포스팅
2. 본론
2-1. 학습 테스트
- 잘 모르는 기능, 라이브러리, 프레임워크를 학습하기 위해 작성하는 테스트
- 여러 테스트 케이스를 스스로 정의하고 검증하는 과정을 통해 보다 구체적인 동작과 기능을 학습할 수 있다.
- 관련 문서만 읽는 것보다 훨씬 재미있게 학습할 수 있다.
구글에서 만든 Guava를 통해서 컬렉션을 가공하는 API들에 대해서 학습테스트를 작성하면서 어떻게 학습해나가는지 살펴본다.
먼저 의존성을 주입받는다.
// Guava
implementation("com.google.guava:guava:33.0.0-jre")
그리고 test-...-cafekiosk 패키지 하위에 learning이라는 패키지를 만들었다.
그리고 GuavaLearningTest라는 클래스에서 Guava 라이브러리를 학습할 수 있다.
@Test
@DisplayName("주어진 개수만큼 List를 파티셔닝한다.")
void partitionLearningTest1() {
    // given
    List<Integer> integers = List.of(1, 2, 3, 4, 5, 6);


    // when
    List<List<Integer>> partition = Lists.partition(integers, 3);

    // then
    assertThat(partition).hasSize(2)
            .isEqualTo(List.of(
                    List.of(1, 2, 3), List.of(4, 5, 6)
            ));
}

@Test
@DisplayName("주어진 개수만큼 List를 파티셔닝한다.")
void partitionLearningTest2() {
    // given
    List<Integer> integers = List.of(1, 2, 3, 4, 5, 6);


    // when
    List<List<Integer>> partition = Lists.partition(integers, 4);

    // then
    assertThat(partition).hasSize(2)
            .isEqualTo(List.of(
                    List.of(1, 2, 3, 4), List.of(5, 6)
            ));
}
테스트 결과는 다음과 같다.
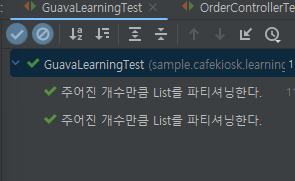
이처럼 라이브러리에서 제공하는 문서나 소스코드의 설명도 볼 수 있겠지만, 읽기만 하는 것보단, 내가 직접 능동적으로 이 테스트 케이스들을 생각을 하면서 어떻게 동작할지에 대한 케이스를 만들고 검증하는 과정에서 학습을 한다.
이처럼 테스트를 학습의 도구로 사용할 수 있는 것이 학습 테스트의 방법이다.
하나 더 해본다.
하나의 키에 여러 개의 value를 넣을 수 있는 multiMap이다.
@Test
@DisplayName("멀티맵 기능 확인")
void multiMapLearningTest() {
// given
Multimap<String, String> multimap = ArrayListMultimap.create();
multimap.put("커피", "아메리카노");
multimap.put("커피", "카페라떼");
multimap.put("커피", "카푸치노");
multimap.put("베이커리", "크루아상");
multimap.put("베이커리", "식빵");
// when
Collection<String> strings = multimap.get("커피");
// then
assertThat(strings).hasSize(3)
.isEqualTo(List.of("아메리카노", "카페라떼", "카푸치노"));
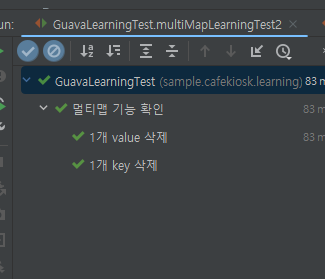
}이번에는 Dynamic 테스트로 일련의 시나리오를 작성해보자.
@TestFactory
@DisplayName("멀티맵 기능 확인")
Collection<DynamicTest> multiMapLearningTest2() {
    // given
    Multimap<String, String> multimap = ArrayListMultimap.create();
    multimap.put("커피", "아메리카노");
    multimap.put("커피", "카페라떼");
    multimap.put("커피", "카푸치노");
    multimap.put("베이커리", "크루아상");
    multimap.put("베이커리", "식빵");

    return List.of(
        DynamicTest.dynamicTest("1개 value 삭제", () -> {
            // when
            multimap.remove("커피", "카푸치노");

            // then
            Collection<String> result = multimap.get("커피");
            assertThat(result).hasSize(2)
                    .isEqualTo(List.of("아메리카노", "카페라떼"));
        }),
        DynamicTest.dynamicTest("1개 key 삭제", () -> {
            // when
            multimap.removeAll("커피");

            // then
            Collection<String> result = multimap.get("커피");
            assertThat(result).isEmpty();
        })
    );
}
결과는 다음과 같다.
말하고자 하는 것은 처음 사용하는 라이브러리나 프레임워크를 학습해 나가는 과정에서 테스트를 이용할 수 있다.
2-2. Spring REST Docs
Spring REST Docs는 개발자가 만든 API를 문서로 만들고 싶을 때 사용한다.
프론트엔드 개발자가 특정 도메인의 화면을 만들 때 백엔드 개발자가 API를 설계하고 개발하는데,
프론트에서 어떤 요청을 주면 우리가 서버에서 이런 응답을 줄게~ 하면서 스펙을 정의를 먼저 한다.
이 때 API의 명세를 먼저 작성할 때 유용하게 사용할 수 있는 것이 API문서이고,
API 문서를 만들 수 있는 여러 가지 도구들 중 하나로 Spring REST Docs가 있다.
Spring REST Docs의 특징은 다음과 같다.
- 테스트 코드를 통한 API 문서 자동화 도구
- API 명세를 문서로 만들고 외부에 제고함으로써 협업을 원활하게 한다.
- 기본적으로 AsciiDoc을 사용하여 문서를 작성한다.
- AsciiDoc은 마크다운과 같은 문서 작성 문법이다.
보통 Spring REST Docs를 사용할 때 Swagger 와 비교를 많이 한다.
장단점을 보면 다음과 같다.
REST Docs의 장단점
- 장점
- 테스트를 통과해야 문서가 만들어진다.
- 신뢰도가 높다.
- 프로덕션 코드에 비침투적이다.
- 테스트를 통과해야 문서가 만들어진다.
- 단점
- 코드 양이 많다.
- 설정이 어렵다.
Swagger의 장단점
- 장점
- 적용이 쉽다.
- 문서에서 바로 API 호출을 수행해볼 수 있다.
- 알록달록하게 이쁘다.
- 단점
- 프로덕션 코드에 침투적이다.
- 테스트와 무관하기 때문에 신뢰도가 떨어질 수 있다.
어떤 게 더 좋다고 하기보단 팀의 상황에 맞춰서 기술을 선택하면 된다.
build.gradle의 설정은 다음과 같다.
plugins {
    id 'java'
    id 'org.springframework.boot' version '3.2.0'
    id 'io.spring.dependency-management' version '1.1.4'
    id "org.asciidoctor.jvm.convert" version "3.3.2"
}

group = 'sample'
version = '0.0.1-SNAPSHOT'

java {
    sourceCompatibility = '21'
}

configurations {
    compileOnly {
        extendsFrom annotationProcessor
    }
    asciidoctorExt
}

repositories {
    mavenCentral()
}

dependencies {
    // Spring boot
    implementation 'org.springframework.boot:spring-boot-starter-web'
    implementation 'org.springframework.boot:spring-boot-starter-data-jpa'
    implementation 'org.springframework.boot:spring-boot-starter-validation'


    // test
    testImplementation 'org.springframework.boot:spring-boot-starter-test'

    // lombok
    compileOnly 'org.projectlombok:lombok'
    annotationProcessor 'org.projectlombok:lombok'

    // h2
    runtimeOnly 'com.h2database:h2'

    // Guava
    implementation("com.google.guava:guava:33.0.0-jre")

    // RestDocs
    asciidoctorExt 'org.springframework.restdocs:spring-restdocs-asciidoctor'
    testImplementation 'org.springframework.restdocs:spring-restdocs-mockmvc'
}

tasks.named('test') {
    useJUnitPlatform()
}

ext { // 전역 변수
    snippetsDir = file('build/generated-snippets')
}

test {
    outputs.dir snippetsDir
}

asciidoctor {
    inputs.dir snippetsDir
    configurations 'asciidoctorExt'

    sources { // 특정 파일만 html로 만든다.
        include("**/index.adoc")
    }
    baseDirFollowsSourceFile() // 다른 adoc 파일을 include 할 때 경로를 baseDir로 맞춘다.
    dependsOn test
}

bootJar {
    dependsOn asciidoctor
    from("${asciidoctor.outputDir}") {
        into 'static/docs'
    }
}
추가된 것은 다음과 같다.
플러그인에 다음과 같이 추가했다.
(강의 찍는 기준으로 아스키독터의 최신 버전이 3.3.2이기 때문에 다음과 같이 했다.)
id "org.asciidoctor.jvm.convert" version "3.3.2"다음은 configurations에 다음과 같이 넣었다.
configurations {
    compileOnly {
        extendsFrom annotationProcessor
    }
    asciidoctorExt // 이 부분이다.
}
그리고 dependencies에 다음과 같이 넣어준다.
// RestDocs
asciidoctorExt 'org.springframework.restdocs:spring-restdocs-asciidoctor'
testImplementation 'org.springframework.restdocs:spring-restdocs-mockmvc'
RestDocs를 사용할 때 mockmvc를 사용하기 위해 위와 같이 의존성을 추가했다.
ext { // 전역 변수
    snippetsDir = file('build/generated-snippets')
}
이 위의 내용은 snippets이라고하는 코드조각들을 정의할 것인데,
snippet들이 담기는 경로를 다음과 같이 지정했다.
test {
    outputs.dir snippetsDir
}
위의 내용은 test가 끝난 결과물을 위에서 설정한 snippet의 디렉터리로 지정하여 저장되게 했다.
다음을 보자.
asciidoctor {
    inputs.dir snippetsDir
    configurations 'asciidoctorExt'

    ...

    dependsOn test
}
여기서 dependsOn을 발견할 수 있는데, 이는 작업 순서를 의미한다.
즉 테스트가 수행된 이후에 asciidoctor 작업이 수행된다는 의미다.
그리고 테스트가 수행된 후에는 snippet의 디렉터리에 테스트의 결과물이 담겨있다.
그러면 그 결과물을 받아서 문서를 만들어준다.
다음은 bootjar이다.
bootJar {
    dependsOn asciidoctor
    from("${asciidoctor.outputDir}") {
        into 'static/docs'
    }
}
asciidoctor의 작업이 수행된 후 나온 문서를 어디로 복사 붙여넣기 할지 지정한한다.
static의 docs 하위에 생성된다.
이제 코드를 작성해볼 것인데, 먼저 인텔리제이에서 AsciiDoc 플러그인을 받고 가자.
asciidoc의 문법이 나와있다.
이제 코드를 보자.
먼저 다음과 같이 Spring Rest Docs에 대한 공통 환경을 제공하는 상위 클래스를 다음과 같이 작성해준다.
package sample.cafekiosk.spring.docs;

import org.junit.jupiter.api.BeforeEach;
import org.junit.jupiter.api.extension.ExtendWith;
import org.springframework.restdocs.RestDocumentationContextProvider;
import org.springframework.restdocs.RestDocumentationExtension;
import org.springframework.test.web.servlet.MockMvc;
import org.springframework.test.web.servlet.setup.MockMvcBuilders;
import org.springframework.web.context.WebApplicationContext;

import static org.springframework.restdocs.mockmvc.MockMvcRestDocumentation.documentationConfiguration;

@ExtendWith(RestDocumentationExtension.class)
public abstract class RestDocsSupport {

    protected MockMvc mockMvc;

    @BeforeEach
    void setUp(WebApplicationContext webApplicationContext,
               RestDocumentationContextProvider provider) {
        this.mockMvc = MockMvcBuilders.webAppContextSetup(webApplicationContext)
                .apply(documentationConfiguration(provider))
                .build();
    }
}
이 코드에서 나오는 WebApplicationContext는 스프링의 컨텍스트다.
즉 @SpringBootTest를 통해서 REST Docs를 작성하는 법이다.
하지만 이렇게 되면 문서를 만들 때도 서버를 띄워야 하는데 우빈님 같은 경우는 굳이라는 입장이다.
WebApplicationContext말고도 다른 방법이 있는데 다음과 같다.
@BeforeEach
void setUp(RestDocumentationContextProvider provider) {
    this.mockMvc = MockMvcBuilders.standaloneSetup(initController())
            .apply(documentationConfiguration(provider))
            .build();
}

protected abstract Object initController();
이렇게 해주면 된다.
standaloneSetup을 이용한다.
파라미터로 들어간 initController()는 매번 여러 컨트롤러를 넣는 것이 번거롭기 때문에,
아래에 initController() 추상메서드를 통해서 어떤 컨트롤러들 들어올 수 있도록 설정했다.
이제 하위 클래스를 작성해보자.
먼저 ProductController의 PostMapping 부분을 작성해본다.
package sample.cafekiosk.spring.docs.product;
import org.junit.jupiter.api.DisplayName;
import org.junit.jupiter.api.Test;
import org.springframework.http.MediaType;
import org.springframework.restdocs.payload.JsonFieldType;
import sample.cafekiosk.spring.api.controller.product.ProductController;
import sample.cafekiosk.spring.api.controller.product.request.ProductCreateRequest;
import sample.cafekiosk.spring.api.service.product.ProductService;
import sample.cafekiosk.spring.docs.RestDocsSupport;
import sample.cafekiosk.spring.domain.ProductSellingStatus;
import sample.cafekiosk.spring.domain.ProductType;
import static org.mockito.Mockito.mock;
import static org.springframework.restdocs.mockmvc.MockMvcRestDocumentation.document;
import static org.springframework.restdocs.payload.PayloadDocumentation.*;
import static org.springframework.test.web.servlet.request.MockMvcRequestBuilders.post;
import static org.springframework.test.web.servlet.result.MockMvcResultHandlers.print;
import static org.springframework.test.web.servlet.result.MockMvcResultMatchers.status;
public class ProductContollerDocsTest extends RestDocsSupport {
private final ProductService productService = mock(ProductService.class); // Mocking처리
@Override
protected Object initController() {
return new ProductController(productService); // SrpingBootTest가 필요없다.
}
@Test
@DisplayName("신규 상품을 등록하는 API")
void createProduct() throws Exception {
ProductCreateRequest request = ProductCreateRequest.builder()
.type(ProductType.HANDMADE)
.sellingStatus(ProductSellingStatus.SELLING)
.name("아메리카노")
.price(4000)
.build();
given(productService.createProduct(any(ProductCreateServiceRequest.class)))
.willReturn(ProductResponse.builder()
.id(1L)
.productNumber("001")
.type(ProductType.HANDMADE)
.sellingStatus(ProductSellingStatus.SELLING)
.name("아메리카노")
.price(4000)
.build()
);
mockMvc.perform(
post("/api/v1/products/new")
.content(objectMapper.writeValueAsString(request))
.contentType(MediaType.APPLICATION_JSON)
)
.andDo(print())
.andExpect(status().isOk())
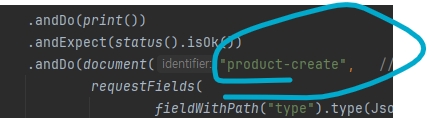
.andDo(document("product-create", // 이후 스니펫을 넣는다. 위의 api 요청을 했을 때 어떤 요청을 넣고, 어떤 응답을 넣을지 정의해주면 된다.
preprocessRequest(prettyPrint()),
preprocessResponse(prettyPrint()),
requestFields(
fieldWithPath("type").type(JsonFieldType.STRING) // 요청 데이터에 대한 이름과 타입
.description("상품 타입"), // 그리고 설명이다.
fieldWithPath("sellingStatus").type(JsonFieldType.STRING)
.description("상품 판매상태"),
fieldWithPath("name").type(JsonFieldType.STRING)
.description("상품 이름"),
fieldWithPath("price").type(JsonFieldType.NUMBER)
.description("상품 가격")
),
responseFields(
fieldWithPath("code").type(JsonFieldType.NUMBER)
.description("코드"),
fieldWithPath("status").type(JsonFieldType.STRING)
.description("상태"),
fieldWithPath("message").type(JsonFieldType.STRING)
.description("메시지"),
fieldWithPath("data").type(JsonFieldType.OBJECT)
.description("응답 데이터"),
fieldWithPath("data.id").type(JsonFieldType.NUMBER)
.description("상품 ID"),
fieldWithPath("data.productNumber").type(JsonFieldType.STRING)
.description("상품 번호"),
fieldWithPath("data.type").type(JsonFieldType.STRING)
.description("상품 타입"),
fieldWithPath("data.sellingStatus").type(JsonFieldType.STRING)
.description("상품 판매상태"),
fieldWithPath("data.name").type(JsonFieldType.STRING)
.description("상품 이름"),
fieldWithPath("data.price").type(JsonFieldType.NUMBER)
.description("상품 가격")
)
));
}
}현재까지 작성된 코드인데, andDo 이하로 REST Docs를 통해서 만들고 있는 코드들이다.
참고로 다음 메서드들은
preprocessRequest(prettyPrint()),
preprocessResponse(prettyPrint()),
이 두 메서드들은 문서에서 JSON 타입에 대한 부분이 이쁘게 오이게 한다.
ProductController에서 다음과 같이 ProductCreateRequest를 요청받았는데,
public class ProductCreateRequest {

@NotNull(message = "상품 타입은 필수입니다.")
private ProductType type;

@NotNull(message = "상품 판매상태는 필수입니다.")
private ProductSellingStatus sellingStatus;

@NotBlank(message = "상품 이름은 필수입니다.")
private String name;

@Positive(message = "상품 가격은 양수여야 합니다.")
private int price;

...
}
ProductCreateRequest의 일부다.
여기의 변수이름 type, sellingStatus, name, price 가
JSON으로는 어떤 타입으로 들어와야하는지, 그리고 변수 이름에 대한 설명을 requestFields의 안에 넣었다.
responseFiels의 안에는 응답 객체의 필드에 대해 작성한다.
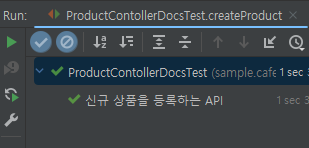
현재까지의 테스트 결과는 성공이다.
그리고 테스트를 수행하면서 Gradle에 다음과 같이 documentation이 생겼다.
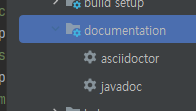
여기서 asciidoctor를 실행해보자.
이를 실행하면 아까 build.gradle 에 정의한대로 테스트를 거쳐서 실행되고 있다.
그리고 실행이 되면 아래와 같이 build의 generated-snippets 안에 다음과 같이 파일들이 생겨난다.
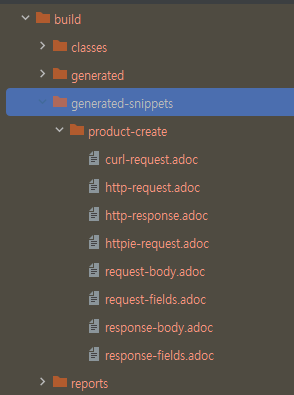
그리고 product-create는 다음과 같이 테스트 코드에서 우리가 작성한 것이다.
그리고 파일 중 하나를 열어보면 다음과 같은데
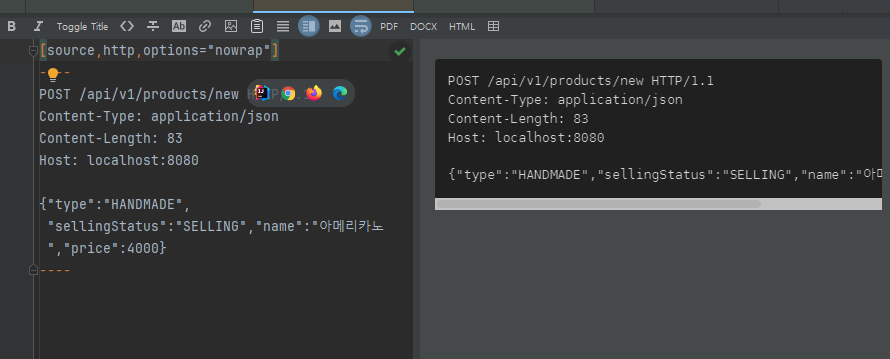
이런 코드 조각 모음들이 생긴 것이다.
이번엔 코드 조각 모음들을 합쳐서 문서를 만들어본다.
여기의 index.adoc에 다음과 같이 작성한다.
ifndef::snippets[]
:snippets: ../../build/generated-snippets
endif::[]

= CafeKiosk REST API 문서
:doctype: book
:icons: font
:source-highlighter: highlightjs
:toc: left
:toclevels: 2
:sectlinks:


[[Product-API]]
== Product API

[[product-create]]
=== 신규 상품 등록

=== HTTP Request
include::{snippets}/product-create/http-request.adoc[]
include::{snippets}/product-create/request-fields.adoc[]

=== HTTP Response
include::{snippets}/product-create/http-response.adoc[]
include::{snippets}/product-create/response-fields.adoc[]
- ifndef~endif : 스니팻의 경로를 지정한다.
- doctype :
- icons :
- source-highlighter : 색을 줄 수 있다.
- toc : left로 지정했는데, 왼쪽에 목차가 생긴다.
- toclevels : 목차에 대한 depth를 지정한다.
- sectlinks : section에 대한 링크이므로, 마우스를 통해 이동할 수 있다.
- 대괄호 두개로 감싸기 : 링크 형태로 변환한다.
- include : 경로를 지정하여 가져올 snippet을 가져올 수 있다.
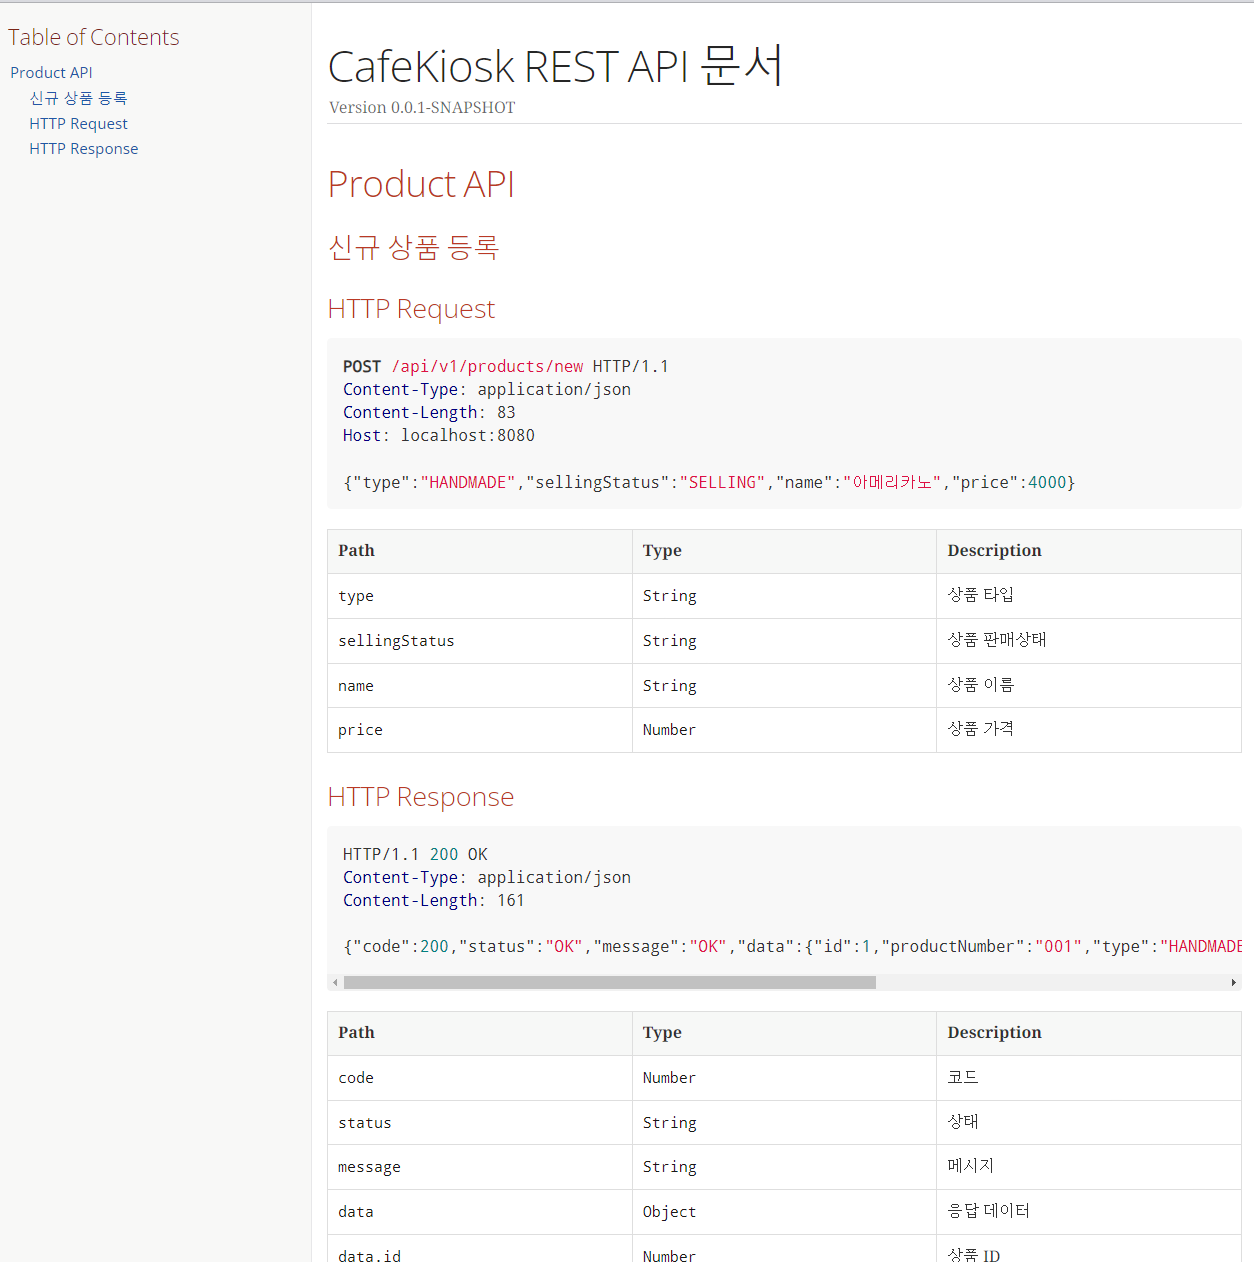
이 상태에서 빌드를 하거나 그래들에서 asciidoc을 실행하면 build의 docs에서 index.html 파일이 만들어지고, 크롬으로 확인해보면 다음과 같은 방식으로 나온다.
요청 템플릿과 응답 템플릿을 다음과 같이 설정할 수 있다.
==== Request Fields
|===
|Path|Type|Optional|Description

{{#fields}}

|{{#tableCellContent}}`+{{path}}+`{{/tableCellContent}}
|{{#tableCellContent}}`+{{type}}+`{{/tableCellContent}}
|{{#tableCellContent}}{{#optional}}O{{/optional}}{{/tableCellContent}}
|{{#tableCellContent}}{{description}}{{/tableCellContent}}

{{/fields}}

|===

///////////

templates==== Response Fields
|===
|Path|Type|Optional|Description

{{#fields}}

|{{#tableCellContent}}`+{{path}}+`{{/tableCellContent}}
|{{#tableCellContent}}`+{{type}}+`{{/tableCellContent}}
|{{#tableCellContent}}{{#optional}}O{{/optional}}{{/tableCellContent}}
|{{#tableCellContent}}{{description}}{{/tableCellContent}}

{{/fields}}
|===
이처럼 템플릿 형식을 만들어서 사용할 수 있다.
그리고 Spring Rest Docs를 사용하면 adoc 파일을 하나로 합쳐서 build를 할 때 하나로 합칠 수 있다.
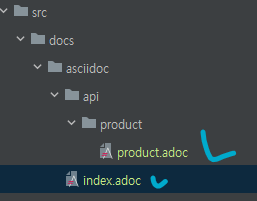
// product.adoc
[[product-create]]
=== 신규 상품 등록

=== HTTP Request
include::{snippets}/product-create/http-request.adoc[]
include::{snippets}/product-create/request-fields.adoc[]


=== HTTP Response
include::{snippets}/product-create/http-response.adoc[]
include::{snippets}/product-create/response-fields.adoc[]

//// index.adoc
ifndef::snippets[]
:snippets: ../../build/generated-snippets
endif::[]

= CafeKiosk REST API 문서
:doctype: book
:icons: font
:source-highlighter: highlightjs
:toc: left
:toclevels: 2
:sectlinks:


[[Product-API]]
== Product API

include::api/product/product.adoc[]
이와 같이 분리해줄 수 있다.
참고로 API 문서 로딩이 실패했을 수 있다.
다음과 같이 build.gradle에 작성해준다.
asciidoctor {
    inputs.dir snippetsDir
    configurations 'asciidoctorExt'

    sources { // 특정 파일만 html로 만든다.
        include("**/index.adoc")
    }
    baseDirFollowsSourceFile() // 다른 adoc 파일을 include 할 때 경로를 baseDir로 맞춘다.
    dependsOn test
}baseDirFollowsSourceFile()를 통해서 다른 adoc파일을 하나로 묶을 수 있다.
그리고 이 코드가 반드시 있어야한다.
sources { // 특정 파일만 html로 만든다.
      include("**/index.adoc")
  }
그리고 asciidoc을 실행하여 index.html 파일을 보면 된다.
지금까지 하나의 API를 Spring Rest Docs를 통해서 문서화해봤다.
3. 요약
학습을 할 때 테스트를 활용할 수 있다는 점과 Spring Rest Docs를 알아보았다.
이번 섹션을 통해서 완강 했다.
TDD에 대한 부분도 있고, 테스트의 범위가 방대하다보니 정리해야될 부분이 많아서 강의 시간의 2배는 강의를 들었던 거 같다.
그래도 이번에 한 번 쫙 정리를 해봤고, 테스트 코드를 작성도하고 고민 포인트에 대해서도 조언을 들을 수 있었는데, 앞으로의 테스트 코드 작성 역량은 내가 어떻게 개발하는지에 따라 달라질 것 같다.
여하튼 강의 하나 끝내니 기분이 좋다.
(나에게 말한다. 수고했다고...(?))