
| 일 | 월 | 화 | 수 | 목 | 금 | 토 |
|---|---|---|---|---|---|---|
| 1 | 2 | 3 | 4 | 5 | 6 | 7 |
| 8 | 9 | 10 | 11 | 12 | 13 | 14 |
| 15 | 16 | 17 | 18 | 19 | 20 | 21 |
| 22 | 23 | 24 | 25 | 26 | 27 | 28 |
| 29 | 30 |
- 자바
- 멀티 쓰레드
- container
- Collection
- filewriter filereader
- 자료구조
- Kubernetes
- Docker
- Thread
- 동시성
- 쓰레드
- java socket
- 김영한
- 인프런
- 도커 엔진
- 자바 입출력 스트림
- 스레드 제어와 생명 주기
- 알고리즘
- 도커
- 컨테이너
- 실전 자바 고급 1편
- LIST
- 시작하세요 도커 & 쿠버네티스
- 자바 io 보조스트림
- 리스트
- 쿠버네티스
- java
- Java IO
- 스레드
- java network
- Today
- Total
쌩로그
리액트를 다루는 기술 - 05. ref - DOM에 이름 달기 본문
목록
- 포스팅 개요
- 본론
2-1. ref는 어떤 상황에서 사용해야 할까?
2-2. ref 사용
2-3. 컴포넌트에 ref 달기 - 요약
1. 포스팅 개요
해당 포스팅은 리액트를 다루는 기술의 05장 ref: DOM에 이름 달기 을 학습하며 정리한 포스팅이다.
2. 본론
일반 HTML에서 DOM 요소에 이름을 달 때는 id를 사용한다.
<div id="my-element"></div>특정 DOM 요소에 어떤 작업을 해야할 때 이렇게 요소에 id를 달면 CSS에서 특정 id에 특정 스타일을 적용하거나 자바스크립트에서 해당 id를 가지 요소를 찾아서 작업할 수 있다.
src/index.js 파일 중에는 id가 root인 요소에 리액트 컴포넌트를 렌더링하라는 코드가 있다.
const root = ReactDOM.createRoot(document.getElementById('root'));
root.render(
  <React.StrictMode>
      <EventHandlingByObject/>  </React.StrictMode>);
이렇게 HTML에서 id를 사용하여 DOM에 이름을 다는 것처럼 리액트 프로젝트 내부에서 DOM에 이름을 다는 방법이 있다.
바로 ref(reference의 줄임말) 개념이다.
참고
리액트 컴포넌트 안에서도 id를 사용할 수는 있다.
JSX 안에서 DOM에 id를 달면 해당 DOM을 레더링할 때 그대로 전달된다.
하지만 특수한 경우가 아니면 사용을 권장하지 않는다.
예를 들어 같은 컴포넌트를 여러 번 사용한다고 가정했을 때 HTM<L에서 DOM의 id는 유일(unique)해야 하는데, 이런 상황에서 중복 id를 가진 DOM이 여러 개 생기니 잘못된 사용이다.

ref는 전역적으로 작동하지 않고, 컴포넌트 내부에서만 작동하기에 이런 문제가 생기기 않는다.

대부분은 id를 사용하지 않고도 원하는 기능을 구현할 수 있지만, 다른 라이브러리나 프레임워크와 함께 id를 사용해야 하는 상황이 발생할 수 있다.
이런 상황에서 컴포넌트를 만들 때마다 id 뒷부분에 추가 텍스트를 붙여서(예: button01, button02, button03, ...) 중복 id가 발생하는 것을 방지해야 한다.
2-1. ref는 어떤 상황에서 사용해야 할까?
ref는 DOM을 꼭 직접적으로 건드려야 할 때 사용한다.
클래스형 컴포넌트에서 ref를 사용하는 방법을 알아보자.
함수형 컴포넌트에서 ref를 사용하려면 Hooks를 사용해야 하기 때문에 이후에 알아본다.
src/ref/ 에서 Validation.css, Validation.js 를 다음과 같이 만든다.
.success {
    background-color: lightgreen;
}

.failure {
    background-color: lightcoral;
}
import React, { Component } from "react";
import './ValidationSample.css';
class ValidationSample extends Component {
state = {
password: '',
clicked: false,
validated: false,
}
handleChange = (e) => {
this.setState({
password: e.target.value
});
}
handleButtonClick = () => {
this.setState({
clicked: true,
validated: this.state.password === '0000'
});
}
render() {
return (
<div>
<input type='password'
value={this.state.password}
onChange={this.handleChange}
className={this.state.clicked ? (this.state.validated ? 'success' : 'failure') : ''}
/>
<button onClick={this.handleButtonClick}>검증하기</button>
</div> );
}
}
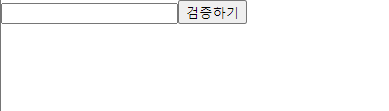
export default ValidationSample;input 에서 onChange 이벤트가 발생하면 handleChange를 호출하여 state의 password 값을 업데이트하게 했다.
button 에서는 onClick 이벤트가 발생하면 handleButtonClick을 호출하여 clicked 값을 참으로 설정했고, validated 값을 검증 결과로 설정했따.
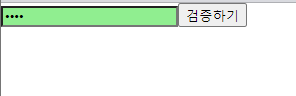
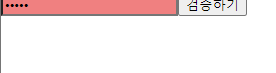
input의 className 값은 버튼을 누르기 전에는 비어있는 문자열을 전달하며, 버튼을 누른 후에는 검증 결과에 따라 success 값 또는 failure 값을 설정한다.
그리고 이 값에 따라 input 색상이 초록색 또는 빨간색으로 나타난다.
아래는 해당 컴포넌트를 렌더링한 결과인데, 0000이면 초록색, 아니면 빨간색이 나온다.
DOM을 꼭 사용해야 하는 상황
앞 예제에서는 state를 사용하여 우리에게 필요한 기능을 구현했지만, 가끔 state만으로 해결할 수 없는 기능이 있다. 예를 들면 다음과 같다.
- 특정 input에 포커스 주기
- 스크롤 박스 조작하기
- Canvas 요소에 그림 그리기 등
이때는 어쩔 수 없이 DOM 에 직접적으로 접근해야 하는데, 이를 위해 바로 ref를 사용한다.
2-2. ref 사용
ref를 사용하는 방법은 두 가지다.
- 콜백 함수를 통한 ref 설정
- createRef를 통한 ref 설정
콜백 함수를 통한 ref 설정
ref를 만드는 가장 기본적인 방법은 콜백 함수를 사용하는 것이다.
ref를 달고자 하는 요소에 ref라는 콜백 함수를 props로 전달하면 된다.
이 콜백 함수는 ref 값을 파라미터로 전달받는다.
그리고 함수 내부에서 파라미터로 받은 ref를 컴포넌트의 멤버 변수로 설정해준다.
<input ref={(ref) => {this.input=ref}} /> //* ref를 컴포넌트의 멤버 변수로 설정*/이렇게 하면 앞으로 this.input은 input 요소의 DOM을 가리킨다.
ref의 이름은 원하는 것으로 자유롭게 지정할 수 있다.
DOM 타입과 관계없이 this.superman = ref 처럼 마음대로 지정한다.
createRef를 통한 ref 설정
ref를 만드는 또 다른 방법은 리액트에 내장되어 있는 createRef라는 함수를 사용하는 것이다.
이 함수를 사용해서 만들면 더 적은 코드로 쉽게 사용할 수 있다.
이 기능은 리액트 v16.3 부터 도입되었으며 이전 버전에서는 작동하지 않는다.
import React, { Component } from "react";

class CreateRefSample extends Component {
    input = React.createRef();

    handleFocus = () => {
        this.input.current.focus();
    }

    render() {
        return (
            <div>
                <input ref={this.input}/>
            </div>        );
    }
}

export default CreateRefSample;createRef를 사용하여 ref를 만들려면 우선 컴포넌트 내부에서 멤버 변수로 React.createRef()를 담아주어야 한다.
그리고 해당 멤버 변수를 ref 를 달고자 하는 요소에 ref props로 넣어주면 ref 설정이 완료된다.
설정한 뒤 나중에 ref를 설정해 준 DOM에 접근하려면 this.input.current를 조회하면 된다.
콜백 함수를 사용할 때와 다른 점은 이렇게 뒷부분에 .current를 넣어주어야 한다.
두 가지 방법중 편한 방법을 사용하면 된다.
ref를 ValidationSapmle에 적용해보자.
import React, { Component } from "react";
import './ValidationSample.css';

class ValidationSample extends Component {
    state = {
        password: '',
        clicked: false,
        validated: false,
    }

    input = React.createRef();

    handleFocus = () => {
        this.input.current.focus();
    }

    handleChange = (e) => {
        this.setState({
            password: e.target.value
        });
    }

    handleButtonClick = () => {
        this.setState({
            clicked: true,
            validated: this.state.password === '0000'
        });
        this.input.focus();
    }

    render() {
        return (
            <div>
                <input                    type='password'
                    value={this.state.password}
                    onChange={this.handleChange}
                    className={this.state.clicked ? (this.state.validated ? 'success' : 'failure') : ''}
                    ref={(ref) => this.input=ref}
                />
                <button onClick={this.handleButtonClick}>검증하기</button>
            </div>        );
    }
}


export default ValidationSample;
버튼에서 onClick 이벤트가 발생할 때 input에 포커스를 주도록 코드를 수정했다.this.input이 컴포넌트 내부의 input 요소를 가리키고 있으니, 일반 DOM을 다루듯이 코드를 작성하면된다.
handleButtonClick = () => {
    this.setState({
        clicked: true,
        validated: this.state.password === '0000'
    });
    this.input.focus();
}

...

<input
    type='password'
    value={this.state.password}
    onChange={this.handleChange}
    className={this.state.clicked ? (this.state.validated ? 'success' : 'failure') : ''}
    ref={(ref) => this.input=ref}
/>
캡쳐 타이밍이 어려웠지만, 커서가 focus된 것을 확인할 수 있다.
2-3. 컴포넌트에 ref 달기
리액트 컴포넌트에도 ref를 달 수 있다.
이 방법은 주로 컴포넌트 내부에 있는 DOM 을 컴포넌트 외부에서 사용할 때 쓴다.
컴포넌트에 ref를 다는 방법은 DOM에 ref를 다는 방법과 같다.
사용법
<MyComponent
    ref={(ref) => {this.myComponent=ref}}
/>
이렇게 하면 MyComponent 내부의 메서드 및 멤버 변수에도 접근할 수 있다.
즉, 내부의 ref에도 접근할 수 있다.
(예: myComponent.handleClick, myComponent.input 등)
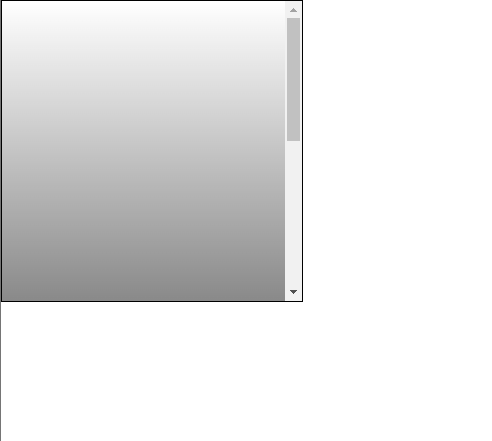
스크롤 박스가 있는 컴포넌트를 하나 만들고, 스크롤바를 아래로 내리는 작업을 부모 컴포넌트에서 실행해보자.
먼저 ScrollBox라는 컴포넌트 파일을 만든다.
JSX의 인라인 스타일링 문법으로 스크롤 박스를 만들고, 최상위 DOM에 ref를 달아준다.
import React, {Component} from "react";


class ScrollBox extends Component {
    render() {
        const style = {
            border: '1px solid black',
            height: '300px',
            width: '300px',
            overflow: 'auto',
            position: 'relative'
        };

        const innerStyle = {
            width: '100%'
            height: '650px'
            background: 'linear-gradient(white, black)'
        }

        return (
            <div
                style={style}
                ref={(ref)=> {this.box=ref}}>
                    <div style={innerStyle}/>
            </div>        )
    }
}

export default ScrollBox;
렌더링하면 다음과 같다.
컴포넌트에 메서드 생성
컴포넌트에 스크롤바를 맨 아래쪽으로 내리는 메서드를 만들자.
자바스크립트로 스크롤바를 내릴 때는 DOM 노드가 가진 다음 값들을 사용한다.
- scrollTop : 세로 스크롤바 위치(0~350)
- scrollHeight : 스크롤이 있는 박스 안의 div 높이(650)
- clientHeight: 스크롤이 있는 박스의 높이(300)
스크롤바를 맨 아래쪽으로 내리려면 scrollHeight에서 clientHeight 높이를 빼면 된다.
import React, {Component} from "react";


class ScrollBox extends Component {

    scrollToBottom = () => {
        const { scrollHeight, clientHeight } = this.box;
        this.box.scrollTop = this.box.scrollHeight - this.box.clientHeight;
    }

    render() {
        const style = {
            border: '1px solid black',
            height: '300px',
            width: '300px',
            overflow: 'auto',
            position: 'relative'
        };

        const innerStyle = {
            width: '100%',
            height: '650px',
            background: 'linear-gradient(white, black)'
        }

        return (
            <div
                style={style}
                ref={(ref)=> {this.box=ref}}>
                    <div style={innerStyle}/>
            </div>        )
    }
}

export default ScrollBox;
컴포넌트에 ref 달고 내부 메서드 사용
렌더링하는 부모 컴포넌트에서 ScrollBox에 ref를 달고 버튼을 만들어 누르면, ScrollBox 컴포넌트의 scrollToBottom 메서드를 실행하도록 코드를 작성한다.
App 컴포넌트에 다음과 같이 작성한다.
import ScrollBox from "./ref/ScrollBox";
import {Component} from "react";

class App extends Component {
  render() {
    return (
        <div>
          <ScrollBox ref={(ref) => this.scrollBox = ref}/>
          <button onClick={() => this.scrollBox.scrollToBottom()}>
            맨 밑으로
          </button>
        </div>    );
  }
}

export default App;
그리고 index에서 App 컴포넌트를 불러오도록 하면 된다.
import React, {Children} from 'react';
import ReactDOM from 'react-dom/client';
import './index.css';
import reportWebVitals from './reportWebVitals';
import App from "./App";

const root = ReactDOM.createRoot(document.getElementById('root'));
root.render(
  <React.StrictMode>
      <App/>  </React.StrictMode>);

reportWebVitals();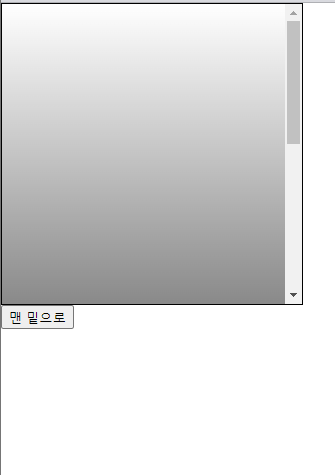
버튼을 누르면 다음과 같이 내려간다.
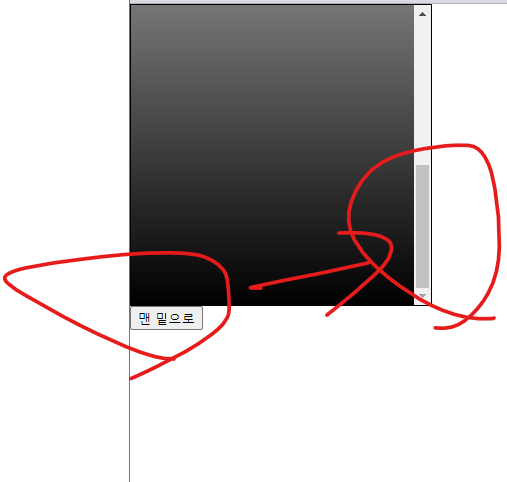
주의할 점은 문법상 onClick = {this.scrollBox.scrollBottom} 같은 형식으로 작성해도 틀린 것은 아니다.
하지만 컴포넌트가 처음 렌더링될 때는 this.scrollBox 값이 undefined 이므로 this.scrollBox.scrolltoBottom 값을 읽어오는 과정에서 오류가 발생한다.
화살표 함수 문법을 사용하여 아예 새로운 함수를 만들고 그 내부에서 this.scrollBox.scrollToBottom 메서드를 실행하면, 버튼을 누를 때(이미 한 번 렌더링을 해서 this.scrollBox를 설정한 시점) this.scrollBox.scrollToBottom 값을 읽어 와서 실행하므로 오류가 발생하지 않는다.
3. 요약
컴포넌트 내부에서 DOM에 직접 접근해야 할 때는 ref를 사용한다.
먼저 ref를 사용하지 않고도 원하는 기능을 구현할 수 있는지 반드시 고려한 후에 활용해야 한다.
서로 다른 컴포넌트끼리 데이터를 교류할 때 ref를 사용한다면 이는 잘못 사용된 것이다.
물론 할수는 있지만, 리액트 사상에 어긋난 설계이다.
앱 규모가 커지면 마치 스파게티처럼 구조가 꼬여 버려서 유지 보수가 불가능하다.
컴포넌트끼리 데이터를 교류할 때는 언제나 데이터를 부모 <-> 자식 흐름으로 교휴해야한다.
나중에 리덕스 혹은 Context API를 사용하여 효율적으로 교류하는 방법을 배울 것이다.
함수현 컴포넌트에서는 useRef 라는 Hook 함수를 사용한다.
자세한 건 8장에서 알아본다.
참고로, this.box=ref 와 같이 ref를 this.xxx에 줌으로써 this.xxx로 DOM에 접근할 수 있는 것이다.
처음 볼 때는 ref를 id처럼 사용한다길레 ref에 id와 같은 값을 주는지 알았는데,
그것이 아니라, ref를 this.xxx에 설정함으로써 this.xxx으로 DOM을 접근하는 것이다...
'Front > React' 카테고리의 다른 글
| 리액트를 다루는 기술 - 07. 컴포넌트의 라이프사이클 메서드 (3) | 2024.04.11 |
|---|---|
| 리액트를 다루는 기술 - 06. 컴포넌트 반복 (0) | 2024.04.10 |
| 리액트를 다루는 기술 - 04. 이벤트 핸들링 (0) | 2024.04.08 |
| 리액트를 다루는 기술 - 03. 컴포넌트 (0) | 2024.04.02 |
| 리액트를 다루는 기술 - 02. JSX (0) | 2024.03.26 |